Check In Resource Manager)
Properly checking in resources lets you track materials and assess any necessary fines. The steps to check in a resource depend on whether the item is barcoded or unbarcoded.
Check In Barcoded Items
- Select Circulation > Check In Items.
- In the Find Item field, scan or type the barcode number of an item.
- If you type the barcode, click Go or press Enter.
Notes:
To check in a quarantined item, the Destiny Administrator must set the number of days to quarantine copies. And if sites are allowed to opt out of quarantine, they must not do so. Users also need the Override resource blocks permission.
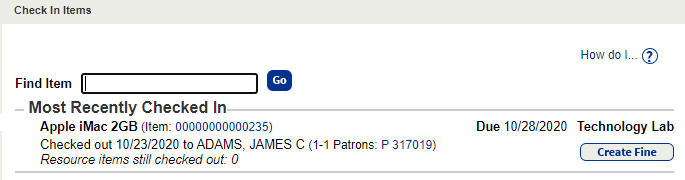
The Most Recently Checked In section shows the item’s name or title, barcode number, due date, and other information.
When you check out, check in, or inventory a resource with components, a pop-up lets you adjust the component quantities, if needed.
In the components pop-up, change the actual count, and click Yes.
Review and update fines, and click OK.
- When you check in a textbook, use the Condition drop-down to select a condition.
Notes:
- Conditioning is not available for Resource Manager Asset Edition.
- Administrators can set up textbook polices so conditions automatically demote based on circulations.
- To create a fine, click Create Fine.
|
Notes:
|
Check In Unbarcoded or Consumable Items
You do not have to check in consumable
Check In a Resource Container
Resources with included items can be checked in like any individual item.
To view all transaction restrictions, see Resource Containers.
Most Recently Checked In
The 10 most recent check-ins are listed under Most Recently Checked In. Information includes:
- Resource name.
- Item's barcode number.
- Due date.
- Item's Home Location.
Beneath that is the person, department or location that checked out the item.
In-Hand Transfer
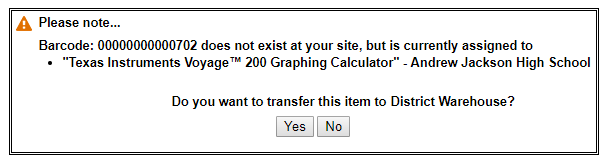
An in-hand transfer is when an item or container from another site in your district is scanned at your site, and then transferred to your site.
|
Notes:
|
|
Example: An item in your district is scanned at your site, but it is currently assigned to another site in the district.
|