Check Out Items to a Location
The To Location checkout option makes it easy to track resources that you temporarily loan or relocate. For example, you might check out a computer cart to the library when the librarian is hosting a computer club meeting.
Destiny checks out the item to the location using the loan period defined in Admin > Resource Policies. To permanently assign an item to another location, Follett recommends that you update the Home Location on the record using either Update Resources or Edit Item in the Catalog.
- Select Circulation > Check Out Items > To Location sub-tab.
- Select a location using one of the following methods:
- Scan the location's barcode in the Find field, or type it in and click
Go.
Note: To print barcode labels or a list of scannable barcodes for your locations, see Location Labels in Reports > Resource Reports.
- Search by keyword. Enter the location's name (or part of a name, followed by *) or number, click Find Location, and select the correct location from the resulting list.
- Click Pick Location, select a Site (if available) and Location from the drop-downs, and then click OK.
- Scan the location's barcode in the Find field, or type it in and click
Go.
- In the Find field, scan the first item’s barcode. The item appears in the Checked Out section. Scanning a second item moves the first item to the Items Out section.
Notes: If you do not have the item barcode at hand:
- To search the database, enter a keyword from the description in the Find Item field, and click Find Item.
- If you do not know the complete word, or are not sure how to spell it, you can use a wildcard, (*), to the end of what you do know. A wildcard can replace any number of letters at the end of a word.
- In the resulting list, click the resource name or Items you want to check out, and click the barcode of an item.
- To search the database, enter a keyword from the description in the Find Item field, and click Find Item.
- To edit the due date for the resource item in the Checked Out section, click Change. Select the new due date and whether it is for this item, this location or the rest of this session.
- To check out resources to a different location, click Reset.
|
Note: When checking out to an active patron, if a message about licensing appears, you do not have the correct site licensing according to your agreement. |
Change the Due Date
To change the due date of the item in the Checked Out section:
- Click Change.
- On the Due Date page, select the desired option on the left. If you choose
Selected date:
- Enter a date in the Selected date field,
- Select a date on the calendar, or
- Select a Loan Period from the list.
- Click Save.
The Special Date prompt then appears in front of the date.
To change the due date of an item listed under Items Out, you must check it out again.
Checkouts
Checkouts do the following:
- Honor the due date assigned in the "by class date range" loan period type.
- Allow textbooks that use the textbook template to be checked out for any of the existing Resource Manager loan period types.
In-Hand Transfer During Checkout
An in-hand transfer is when an item or container from another site in your district is scanned at your site, and then transferred to your site.
|
Notes:
|
|
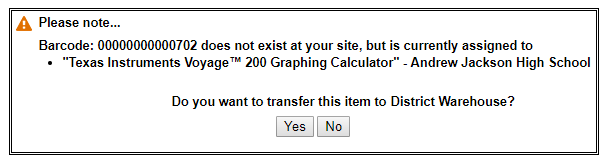
Example: An item in your district is scanned at your site, but it is currently assigned to another site in the district.
|