Add Resource Order Shipment (Warehouse)
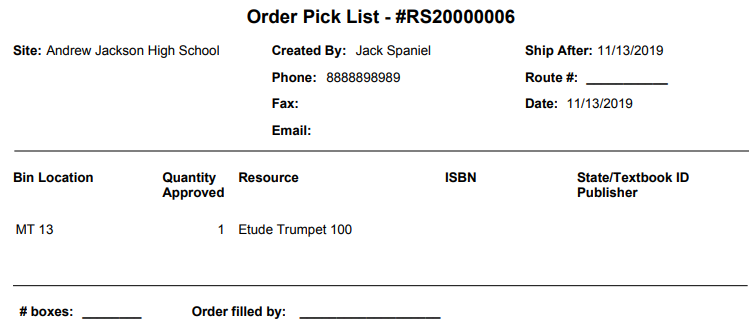
After approving the order, the warehouse can create a pick list with details about the site, order number and required shipping date, as well as the bin location, title, ISBN and number of resources. Warehouse personnel can then write in the route number and number of boxes, and sign to identify who fulfilled the order on the pick list.
Create a Pick List for an Approved Order
- Select Catalog > Resource Orders > Track sub-tab.
- Next to the order you want to create a pick list for, click
 .
.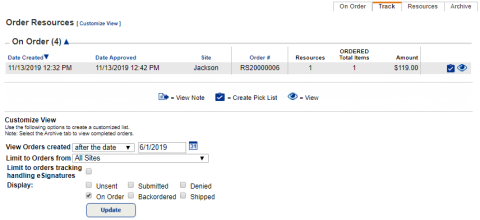
- The Job Manager opens. To update the job status, click Refresh List.
- When the status is Completed, click View to see the Job Summary.
- Print the pick list, and manually enter the Route #, # boxes and Order filled
by fields.
-
Pick the resources from the warehouse.
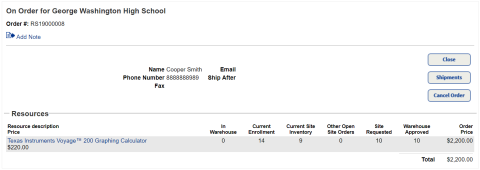
Ship the Order
After gathering the resources on the pick list, warehouse users can create a shipment in Resource Manager by barcode or by copy count. A packing list can be included in the shipment. As soon as the shipment is created and shipped, ownership of the copies is changed to the receiving site in Resource Manager.
To create a shipment for the order:
- From Catalog > Resource Orders > Track sub-tab, click
 .
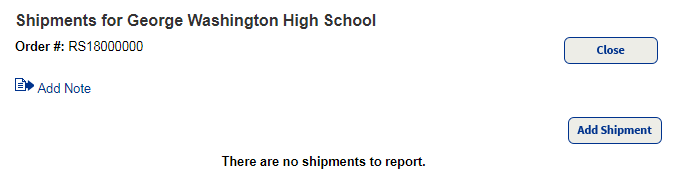
. - On the On Order page, click Shipments.
- To add a note, click
 Add Note. For steps, see Add or View Note.
 - Click Add Shipment.
- Do one of the following:
If the resource items are… Then... Barcoded 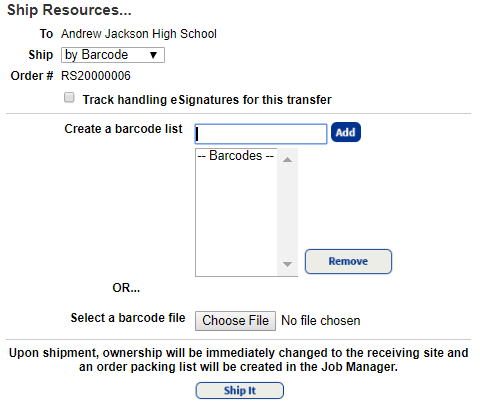
- From the Ship drop-down, select by Barcode.
- To track an eSignature as the resources move through the transfer process, select the Track handling eSignatures for this transfer checkbox.
- Scan the barcodes directly into the Create a barcode list field, or click Choose File to upload a file of the barcodes.
- When you are ready to transfer the resources, click Ship It.
Not barcoded 
- From the Ship drop-down, select by Item Count.
- To track an eSignature as the resources move through the transfer process, select the Track handling eSignatures for this transfer checkbox.
- Type the number of each resource being shipped in the # to Ship field, and then click Select.
- When you are ready to transfer the resources, click Ship It.
- The Job Manager opens. When the status is Completed, click View to see the Job Summary.
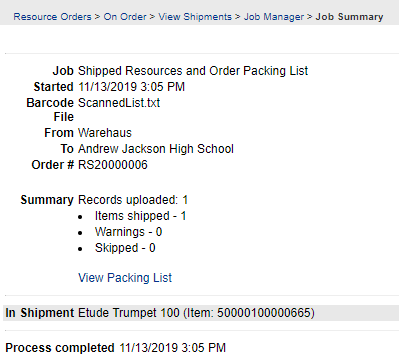
- The Job Summary opens. To print the packing list, click View Packing List.
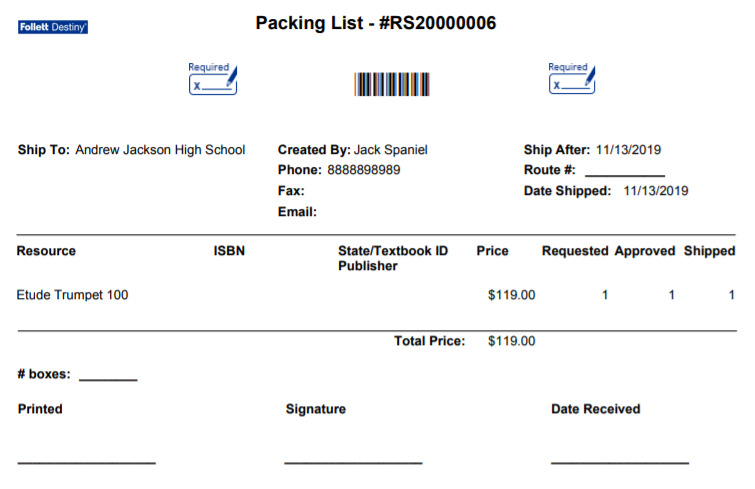
- Print the packing list to include in the box to be shipped.
The order shows as shipped on the Track sub-tab.